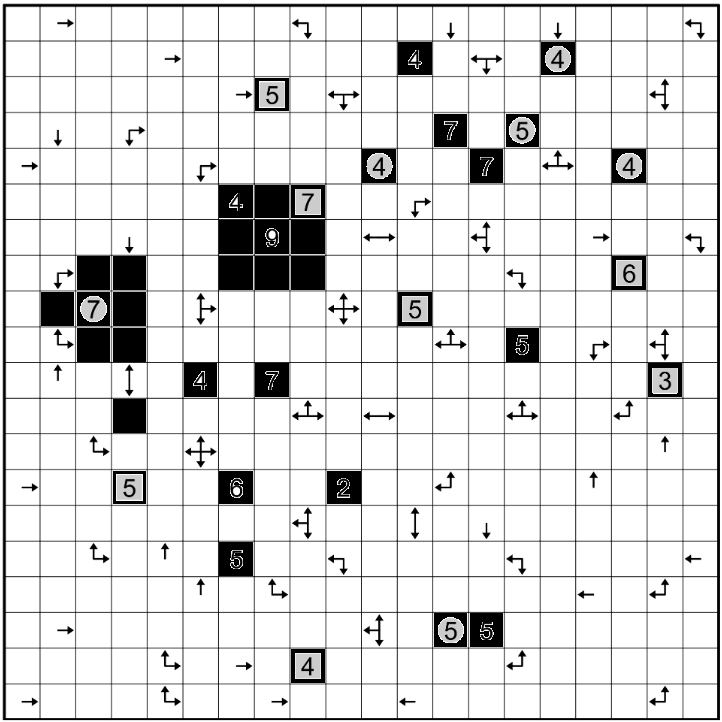
November 2025: Shut the Box
This puzzle had it all: satisfying logical deduction, geometric reasoning, and an air or originality. I hope to see more puzzles like this throughout 2026.
Stats:
Difficulty: 7/10
Enjoyability: 8/10
Leaderboard Placing: 498/500
The approach:
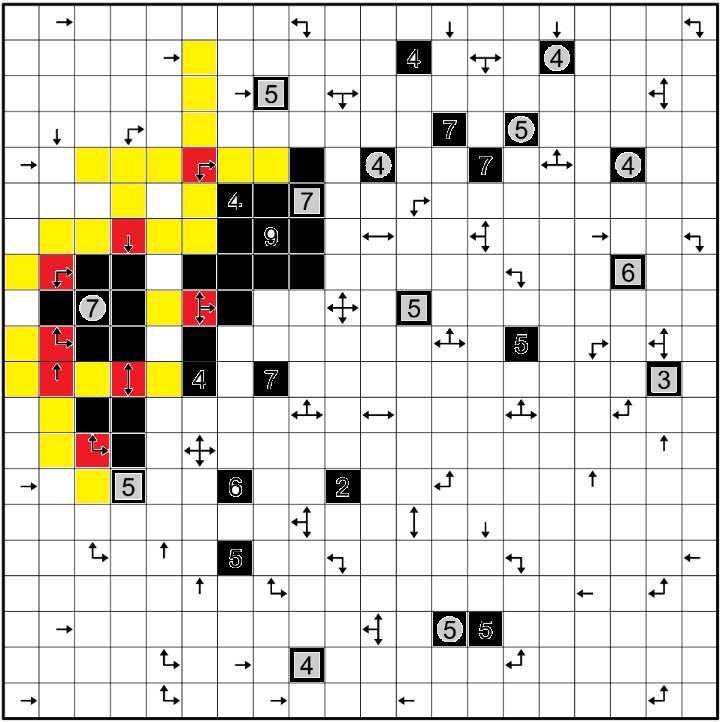
I started by copying a screenshot of the board into MS Paint, and filled squares with certain colours as I made logical deductions. Each square I could conclude was part of the box I coloured black, and each square I could conclude wasn’t part of the box I coloured yellow, except for the squares containing arrows, which I coloured red once I was sure I’d extracted all possible information from them. To write out all deductions which led to the final result would be difficult, but I’ll illustrate with a couple examples the kinds of deductions that can be made.
After colouring all numbered squares black to signify that they’re part of the box, the most obvious step is to colour black all squares surrounding the number 9, as well as all non-arrow squares surrounding the left-most number 7:
One can then make various deductions about which squares in the vicinity of the 7 can’t be included in the box. For example, the square containing two arrows immediately northwest of the 7 currently has two non-coloured neighbours; we colour them yellow to signify they aren’t included in the box, since if they were, the square with the two arrows would need two additional arrows pointing towards them. More generally, if one has a square containing arrows, and one has determined that the nearest black square in one of the directions in which an arrow points is \(n\) cells away, then one can correctly colour all squares up to distance \(n\) from the original square in all four directions. Indeed, in any direction in which an arrow points, there must be \(n-1\) squares in a row not included in the box followed immediately by one square which is included in the box, whereas in any direction in which an arrow doesn’t point, there must simply be \(n\) squares in a row not included in the box. After having made such a deduction, one can colour the original square red, since one has extracted all possible information from it. The state of the board after making some such deductions is as follows:
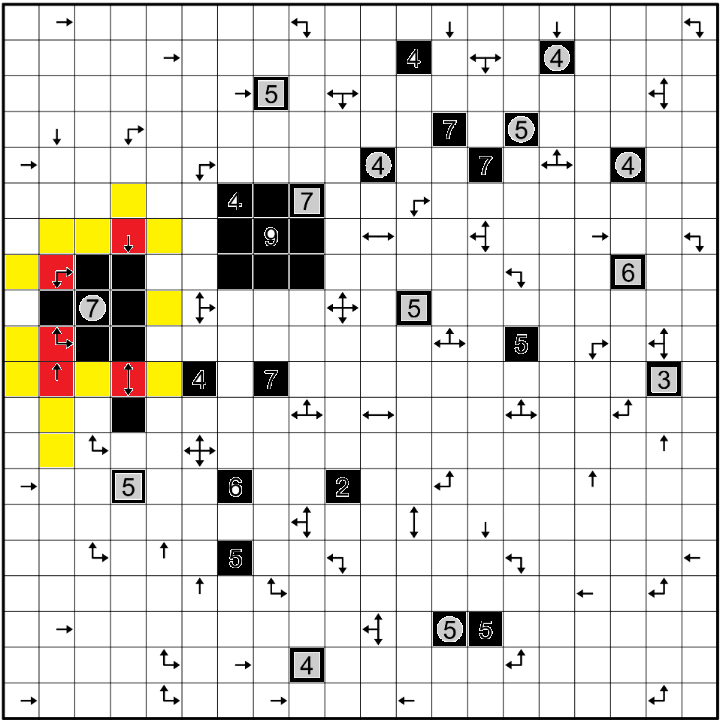
We note that the lower-most yellow square has been coloured by applying the above rule to the square with the arrow two cells above it: we know that the nearest black square in the direction of the arrow is two cells above, so we can conclude that the cell two squares below doesn’t belong to the box.
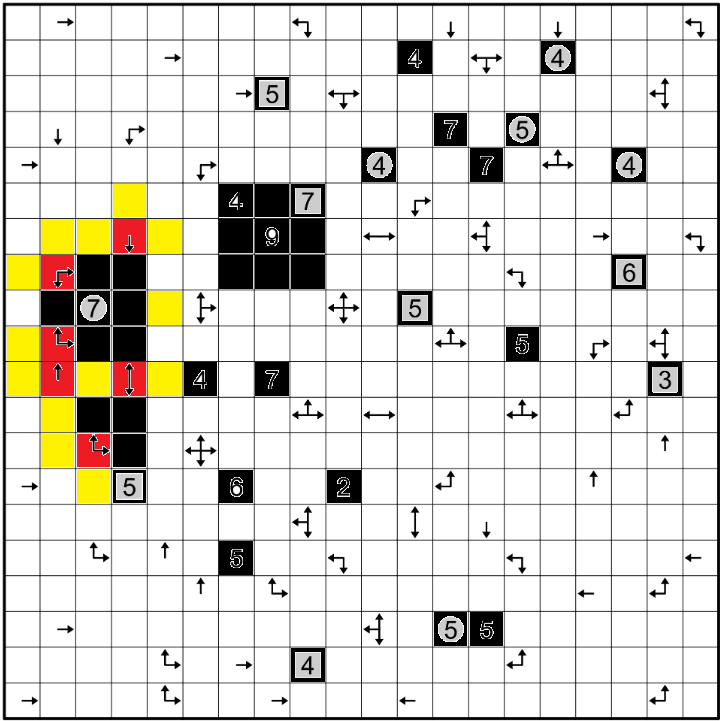
Another kind of deduction which is possible is to consider a black square pointed to by an arrow, which one is currently uncertain is the nearest black square in that direction. By comparing what is known in other directions, one can sometimes draw conclusions. For example, the square immediately to the right of the yellow square just discussed contains arrows pointing up and to the right. Currently, there is a black square three cells above, and if this were the nearest black square in that direction, there would also need to be a black square three cells to the right of the original square. But this square contains arrows, and is therefore not part of the box. It follows that the black square three cells above the original is not the nearest black square in that direction, and we conclude that there must instead be a black square immediately above the original, as well as one black square immediately to the right. We can then colour the cell immediately below the original yellow, as well as colour the original cell itself red:
We can make similar deductions surrounding the square with three arrows immediately southwest of the 3x3 block surrounding the 9: there’s a black square two cells to the left, which can’t be the closest black square, otherwise the original square would need an arrow pointing to the left. It follows that there must be black squares just one cell away in each of the directions in which the arrows point:
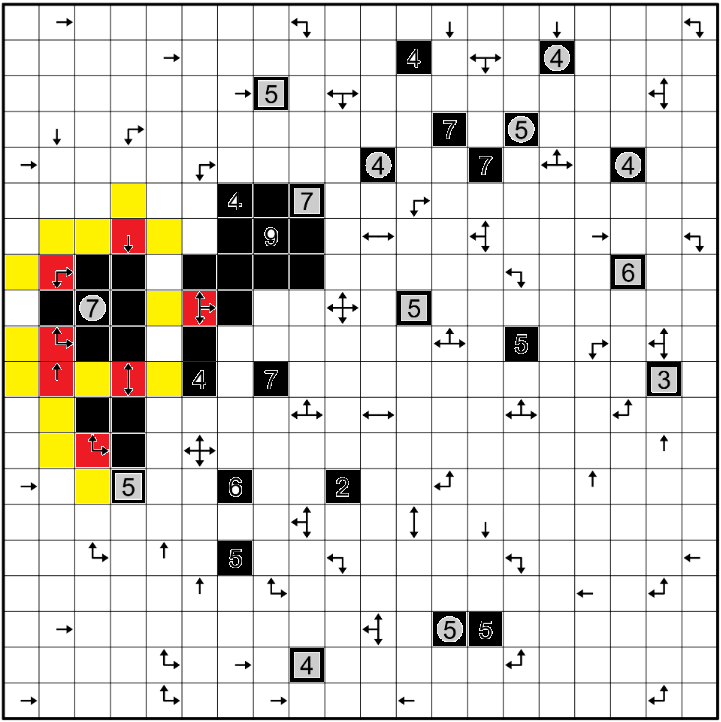
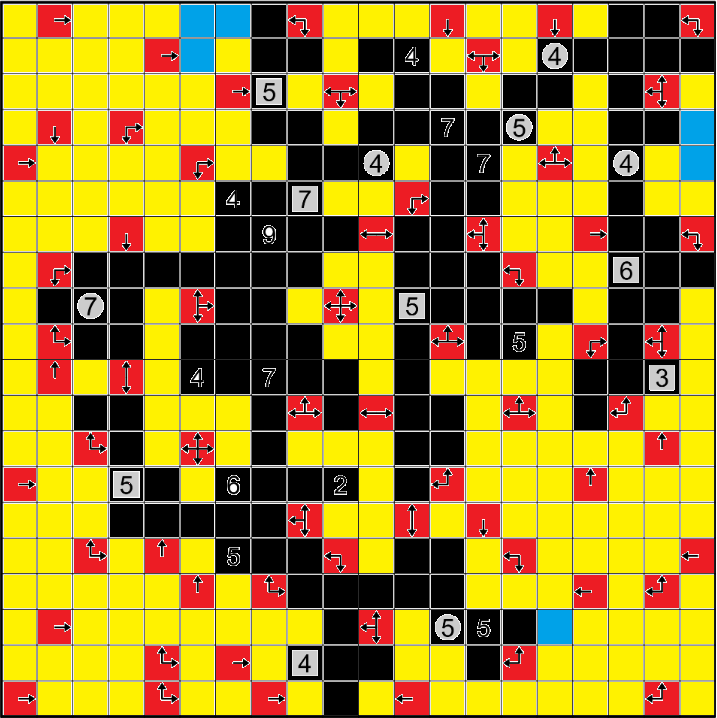
Now consider the square with two arrows immediately northwest of the 3x3 block surrounding the 9. None of the two squares below this can be coloured black, since the nearby 4 already has four adjacent black squares. The nearest black square below the original square must therefore be the one just coloured three cells below, and we may therefore make strong deductions in each direction centred at the original square, as shown below:
This leads to a cascade of deductions in neighbouring areas. One type of argument that one shouldn’t forget to make is appeals to connectedness of the final net. For example, we currently have a white square that’s surrounded by yellow and red squares which aren’t part of the net; it follows that this white square itself can’t be part of the net, and we may colour it yellow. Continuing in this fashion, appealing to established rules as well as ad hoc arguments when necessary, one eventually colours the whole grid. I found this process highly fun and satisfying, and it took me approximately an hour. The result is as follows, where I’ve coloured blue a few boxes whose status can’t be uniquely determined:
Folding this net into a box is no easy task, but it’s made simpler by the observation that the two grey regions in the following screenshot are identical, though flipped horizontally and vertically relative to each other:
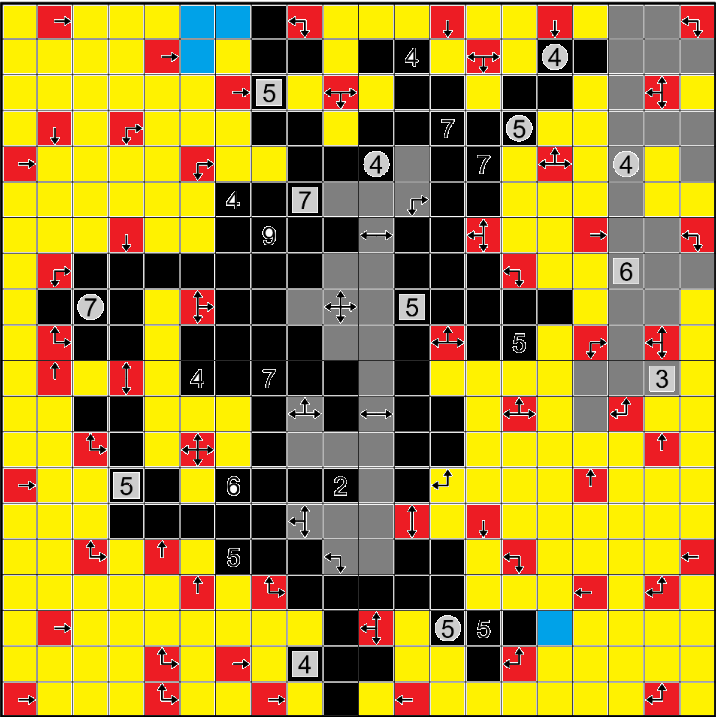
Since the right-most grey region is part of the box and the left-most grey region isn’t, one is led to believe that these regions should slot into each other when folding the net. (Note that we’ve used this intuition to infer that some of the previous blue squares ought to be part of the box.) Once one sees how these two regions should “meet up”, the rest of the folding starts to become clear, and one is led to the solution shown on the Jane Street website. The inclusion/exclusion of the remaining blue squares is determined by the net folding process itself.
Personally, I was able to find and realise the significance of the pair of grey regions shown above, but I couldn’t manage to make them slot together mentally. My biggest problem was that I was trying to take the right-most grey region and twist it many times to slot into the left-most grey region, and the mental manipulations became too much to handle. As I should have realised, it’s a little easier to imagine the grey regions slotting together by having each of them twist a couple of times to meet in the middle, but either way, I think this is very difficult to do mentally. My thanks go to Fred Vu, who guided me to a solution at the end of the month with some very strong hints. Impressively, he was able to do all of this within a few hours of the puzzle being released.